Week 12 - DAC Synthesizer

In this lab, we used the XIAO ESP32-S3 to create a musical keyboard. It seems fitting to describe this device as a synthesizer, since we use the microcontroller to generate a sine wave and then modulate its characteristics using button presses.
Initial circuit design
The key design detail of our circuit is the use of the binary weighted method to create a digital-to-analog converter (DAC), which essentially uses a series of resistors to change the voltage of each output pin. For example, the second output of the DAC uses a resistor with twice the resistance of the first output, and the third and fourth outputs follow a similar sequence. The image below shows our initial circuit, which required a bit of debugging.
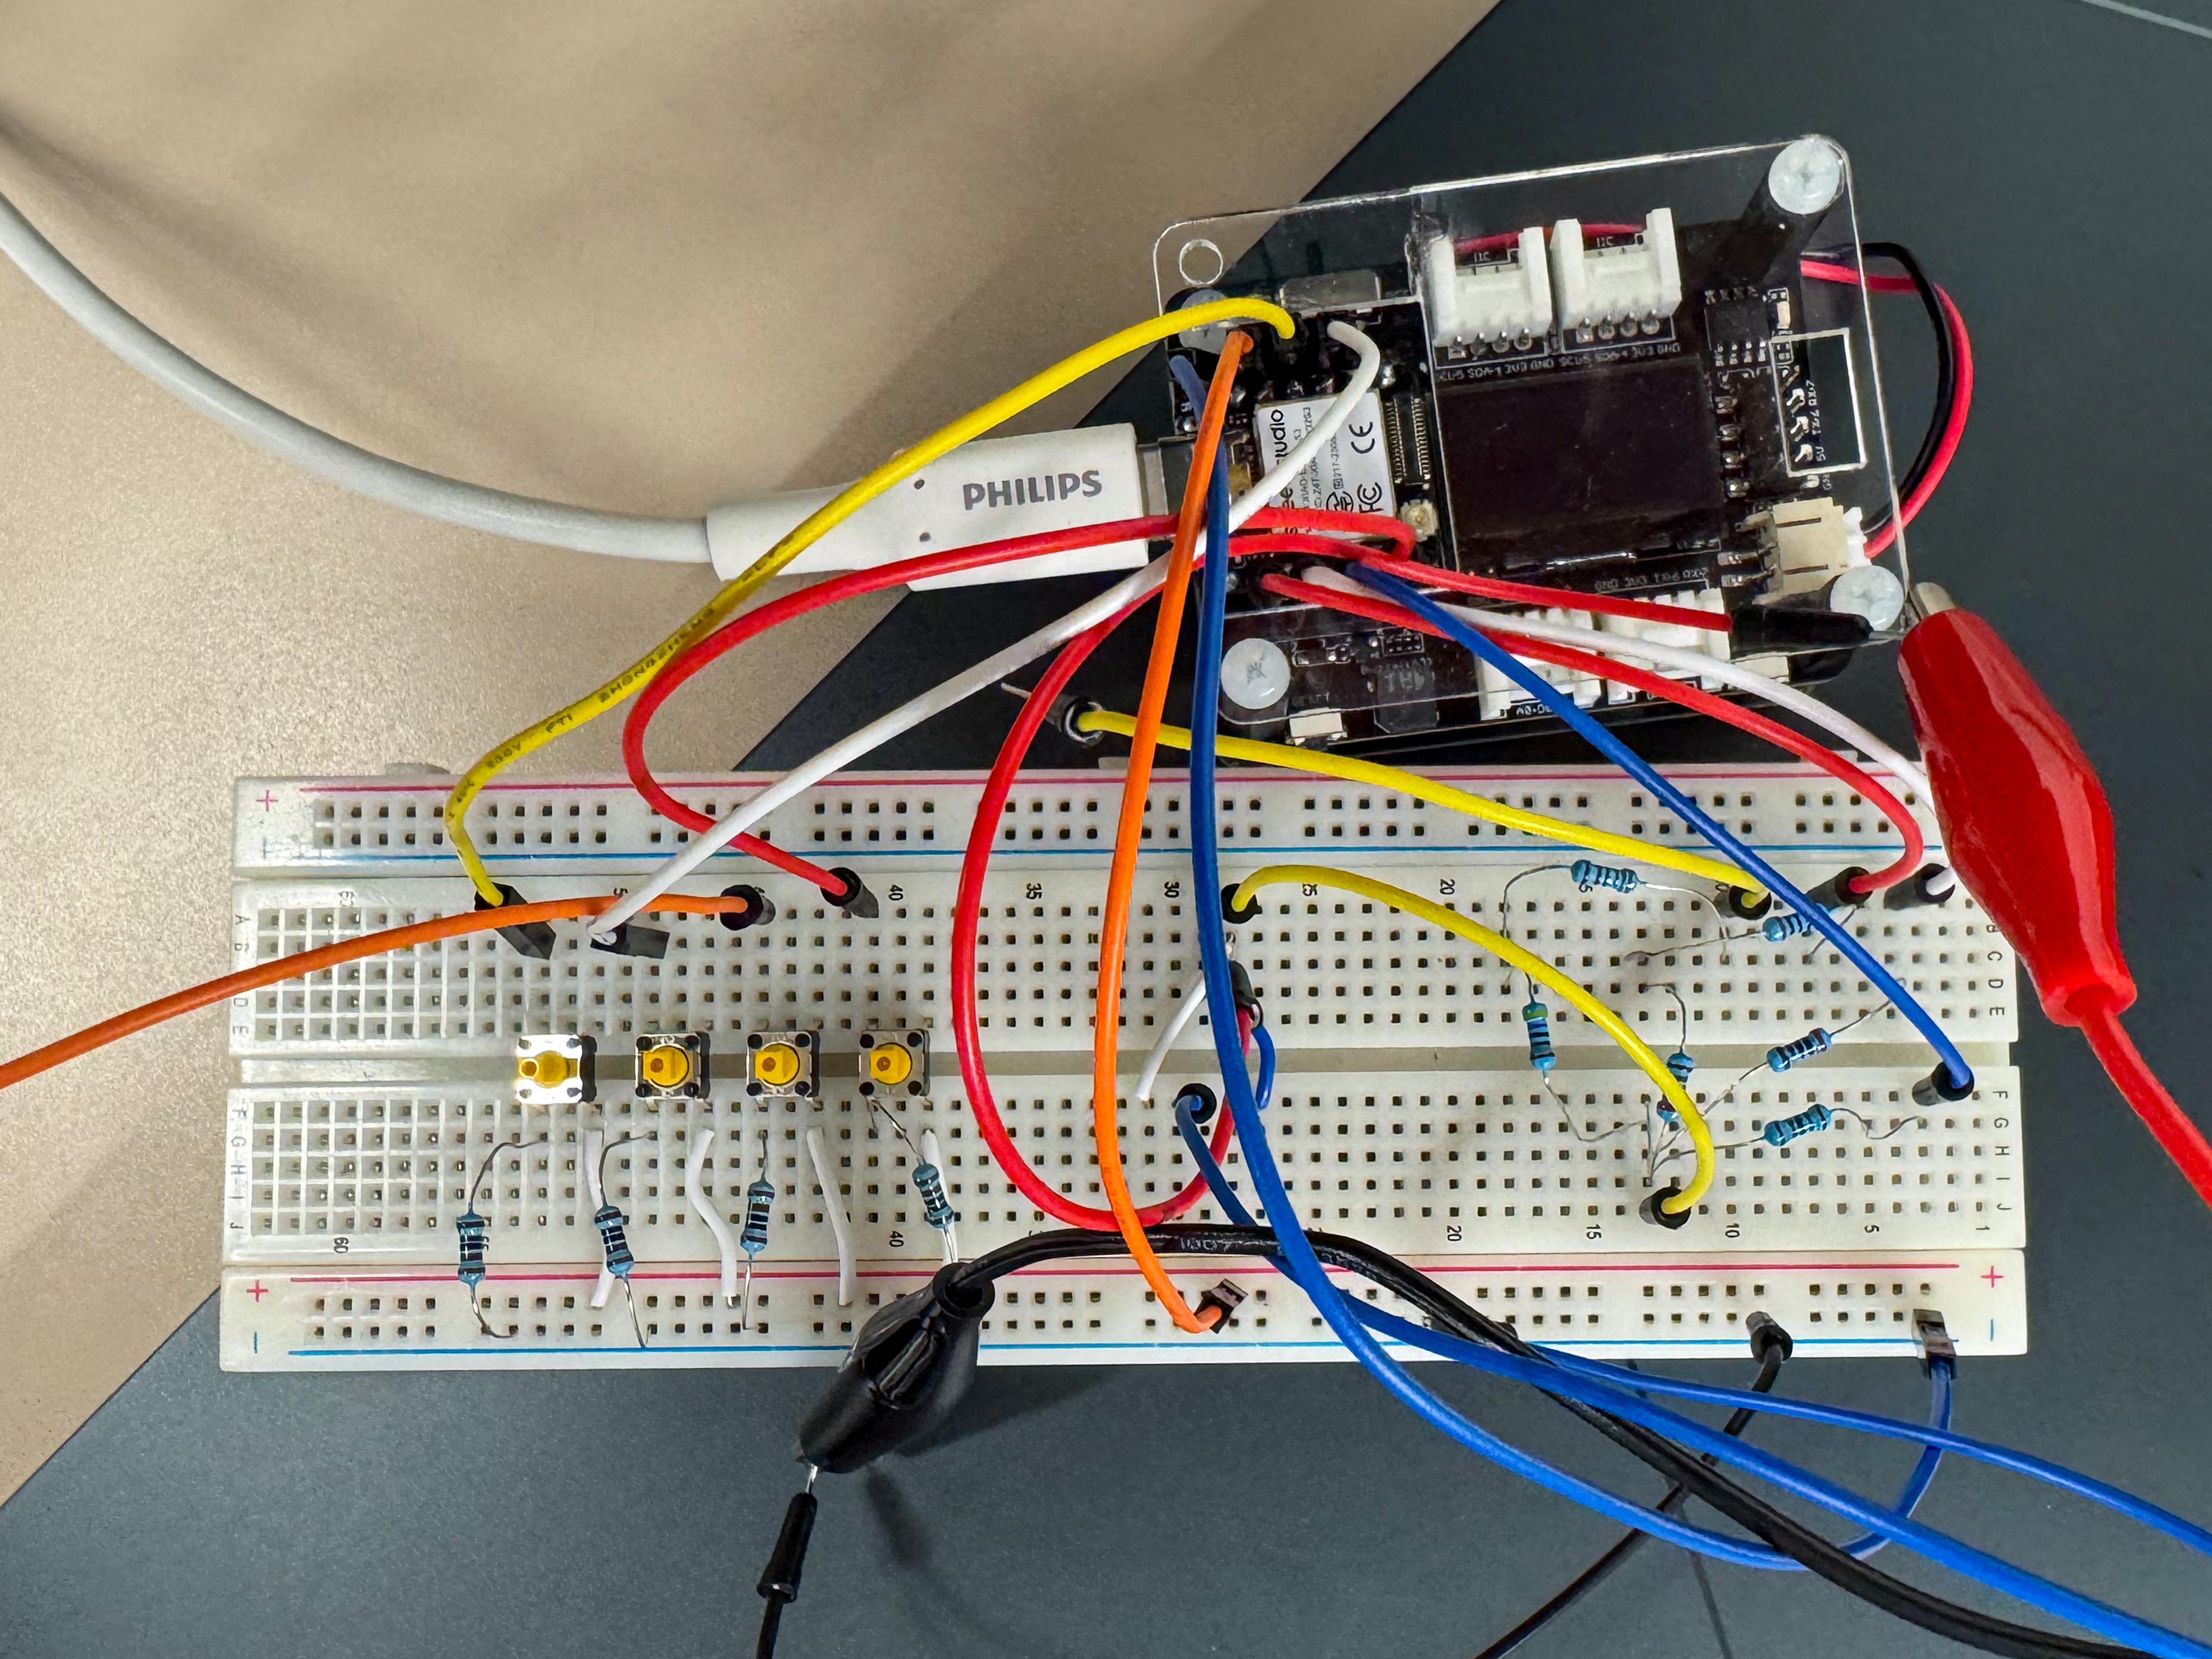
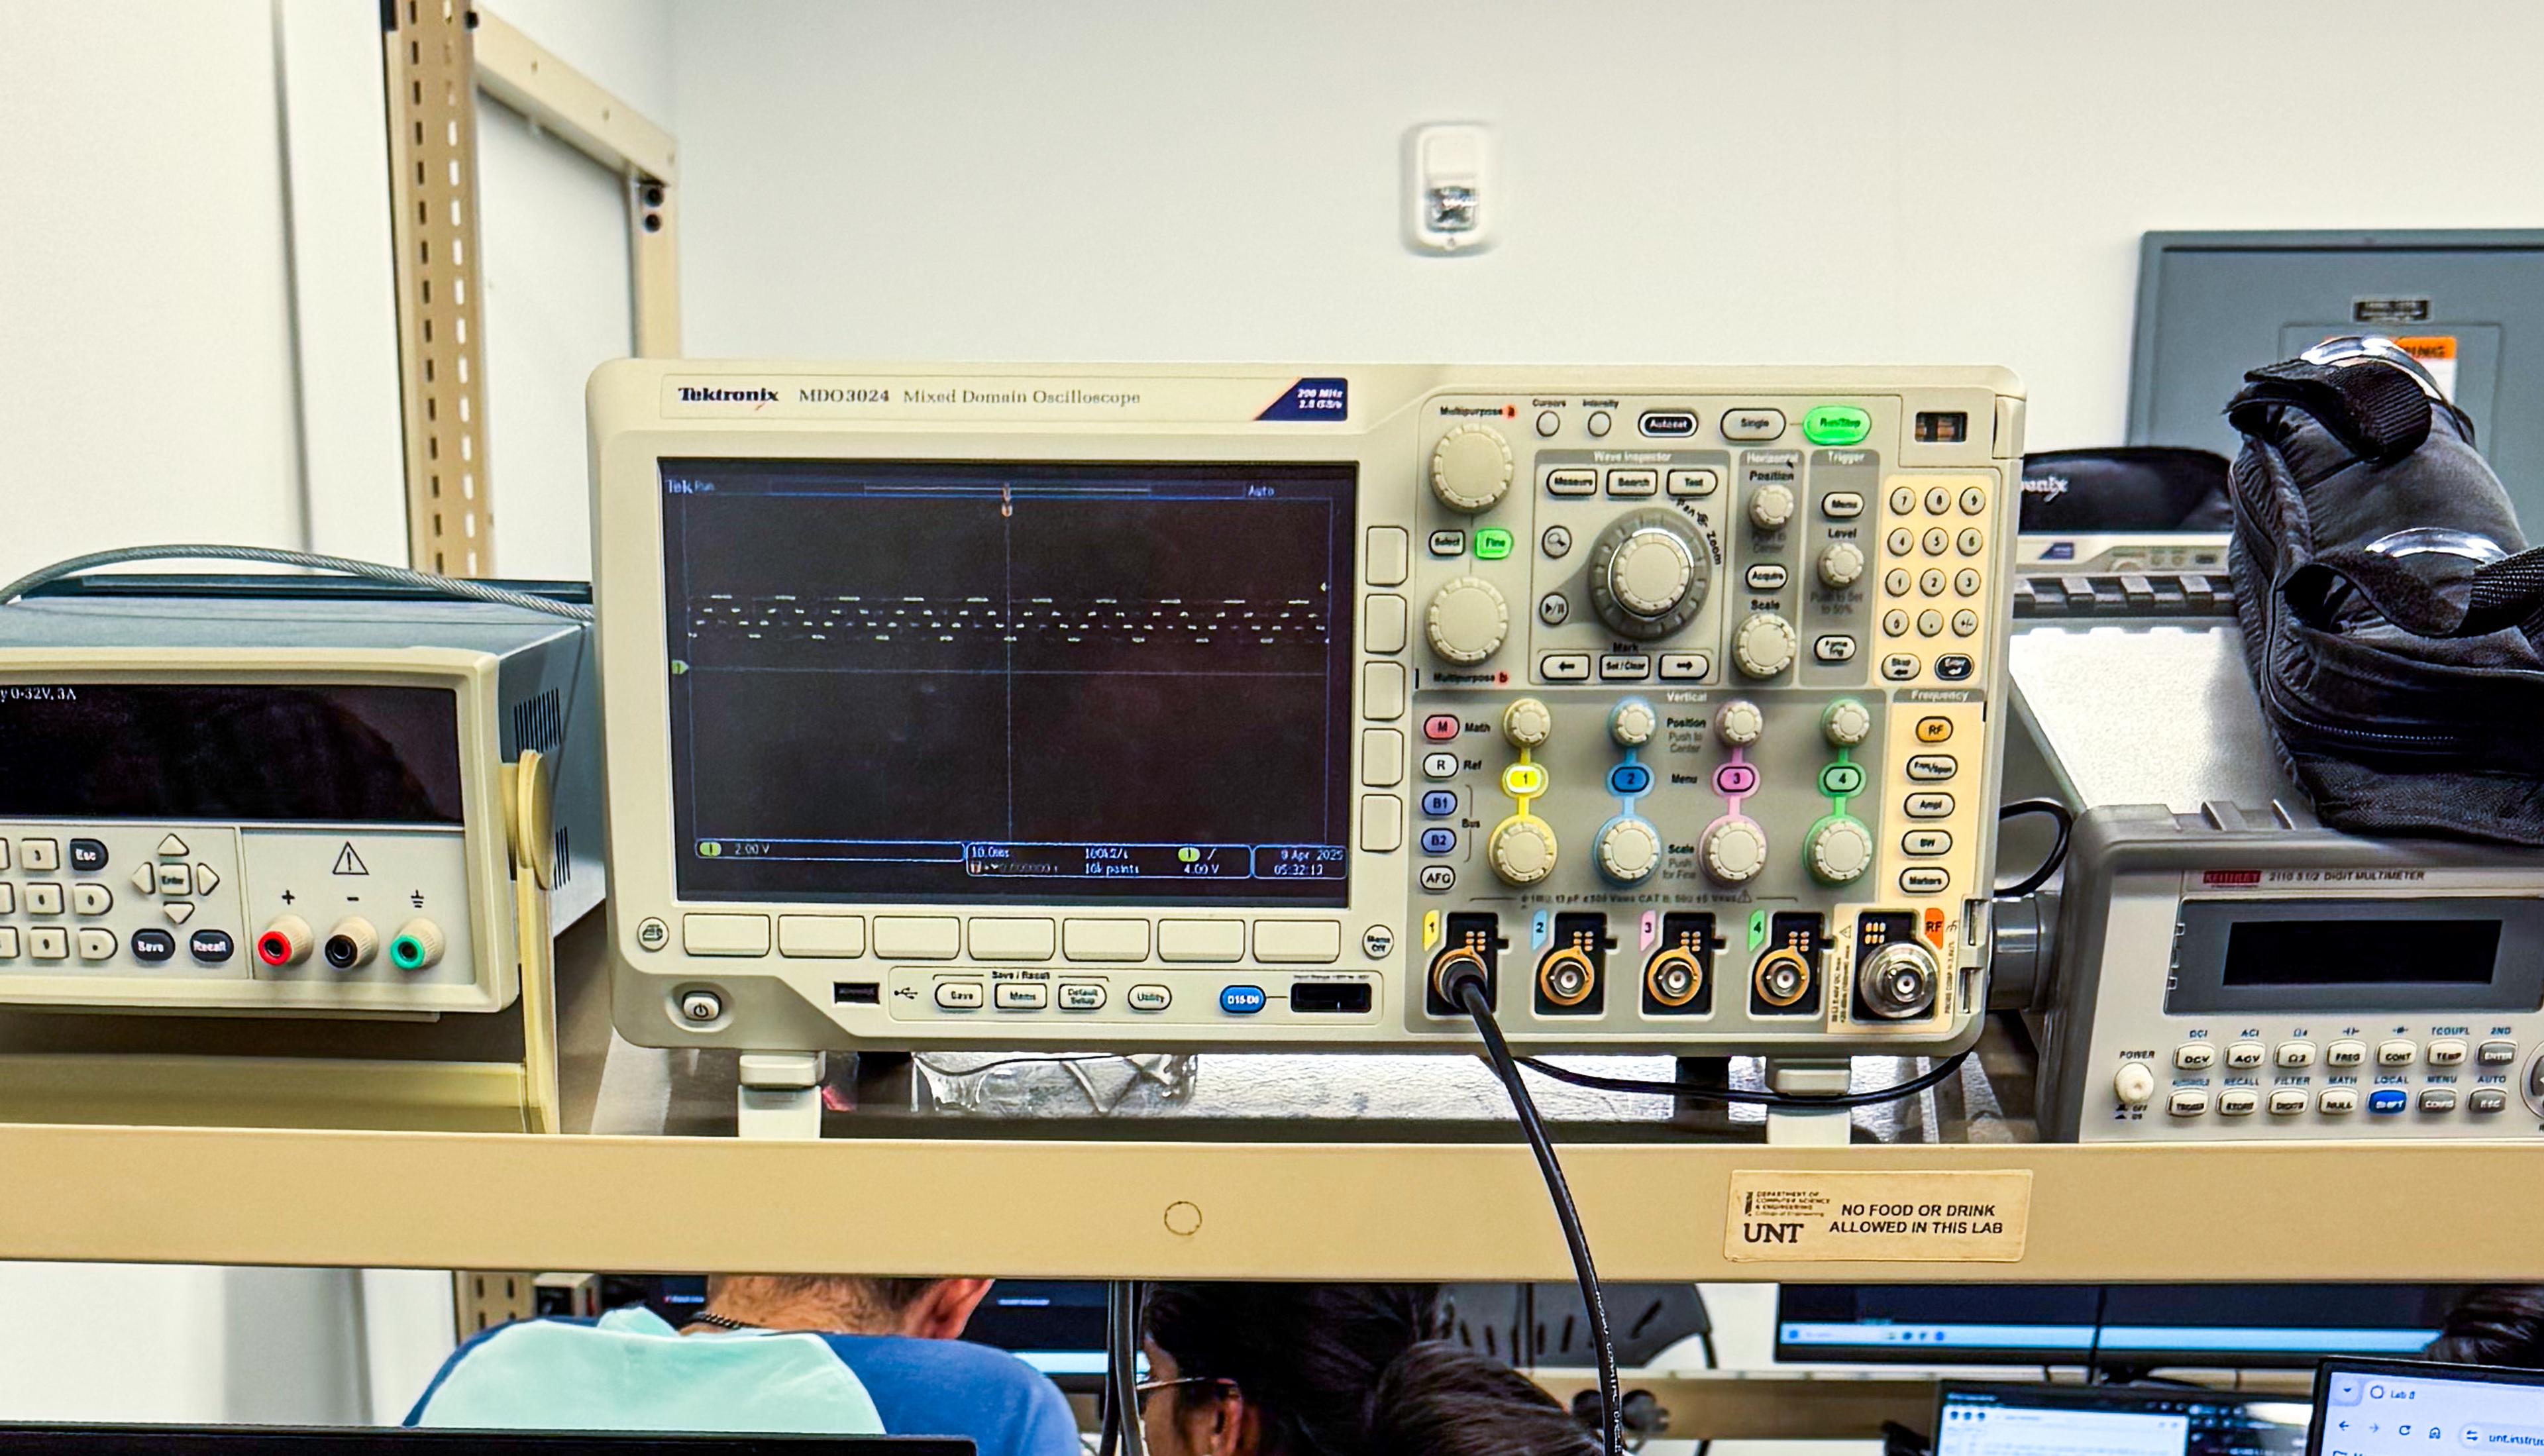
With a lot of help from Dr. Pedram, we were able to generate a sine wave using the device that was visible on the oscilloscope.

Generating audio
With a semi-functional circuit, our next task required using the device to produce four different tones. We used the ESP Timer library to create periodic timers, which ultimately iterates over a 4-bit sine wave at similar frequencies to the musical notes C, D, E, and G.
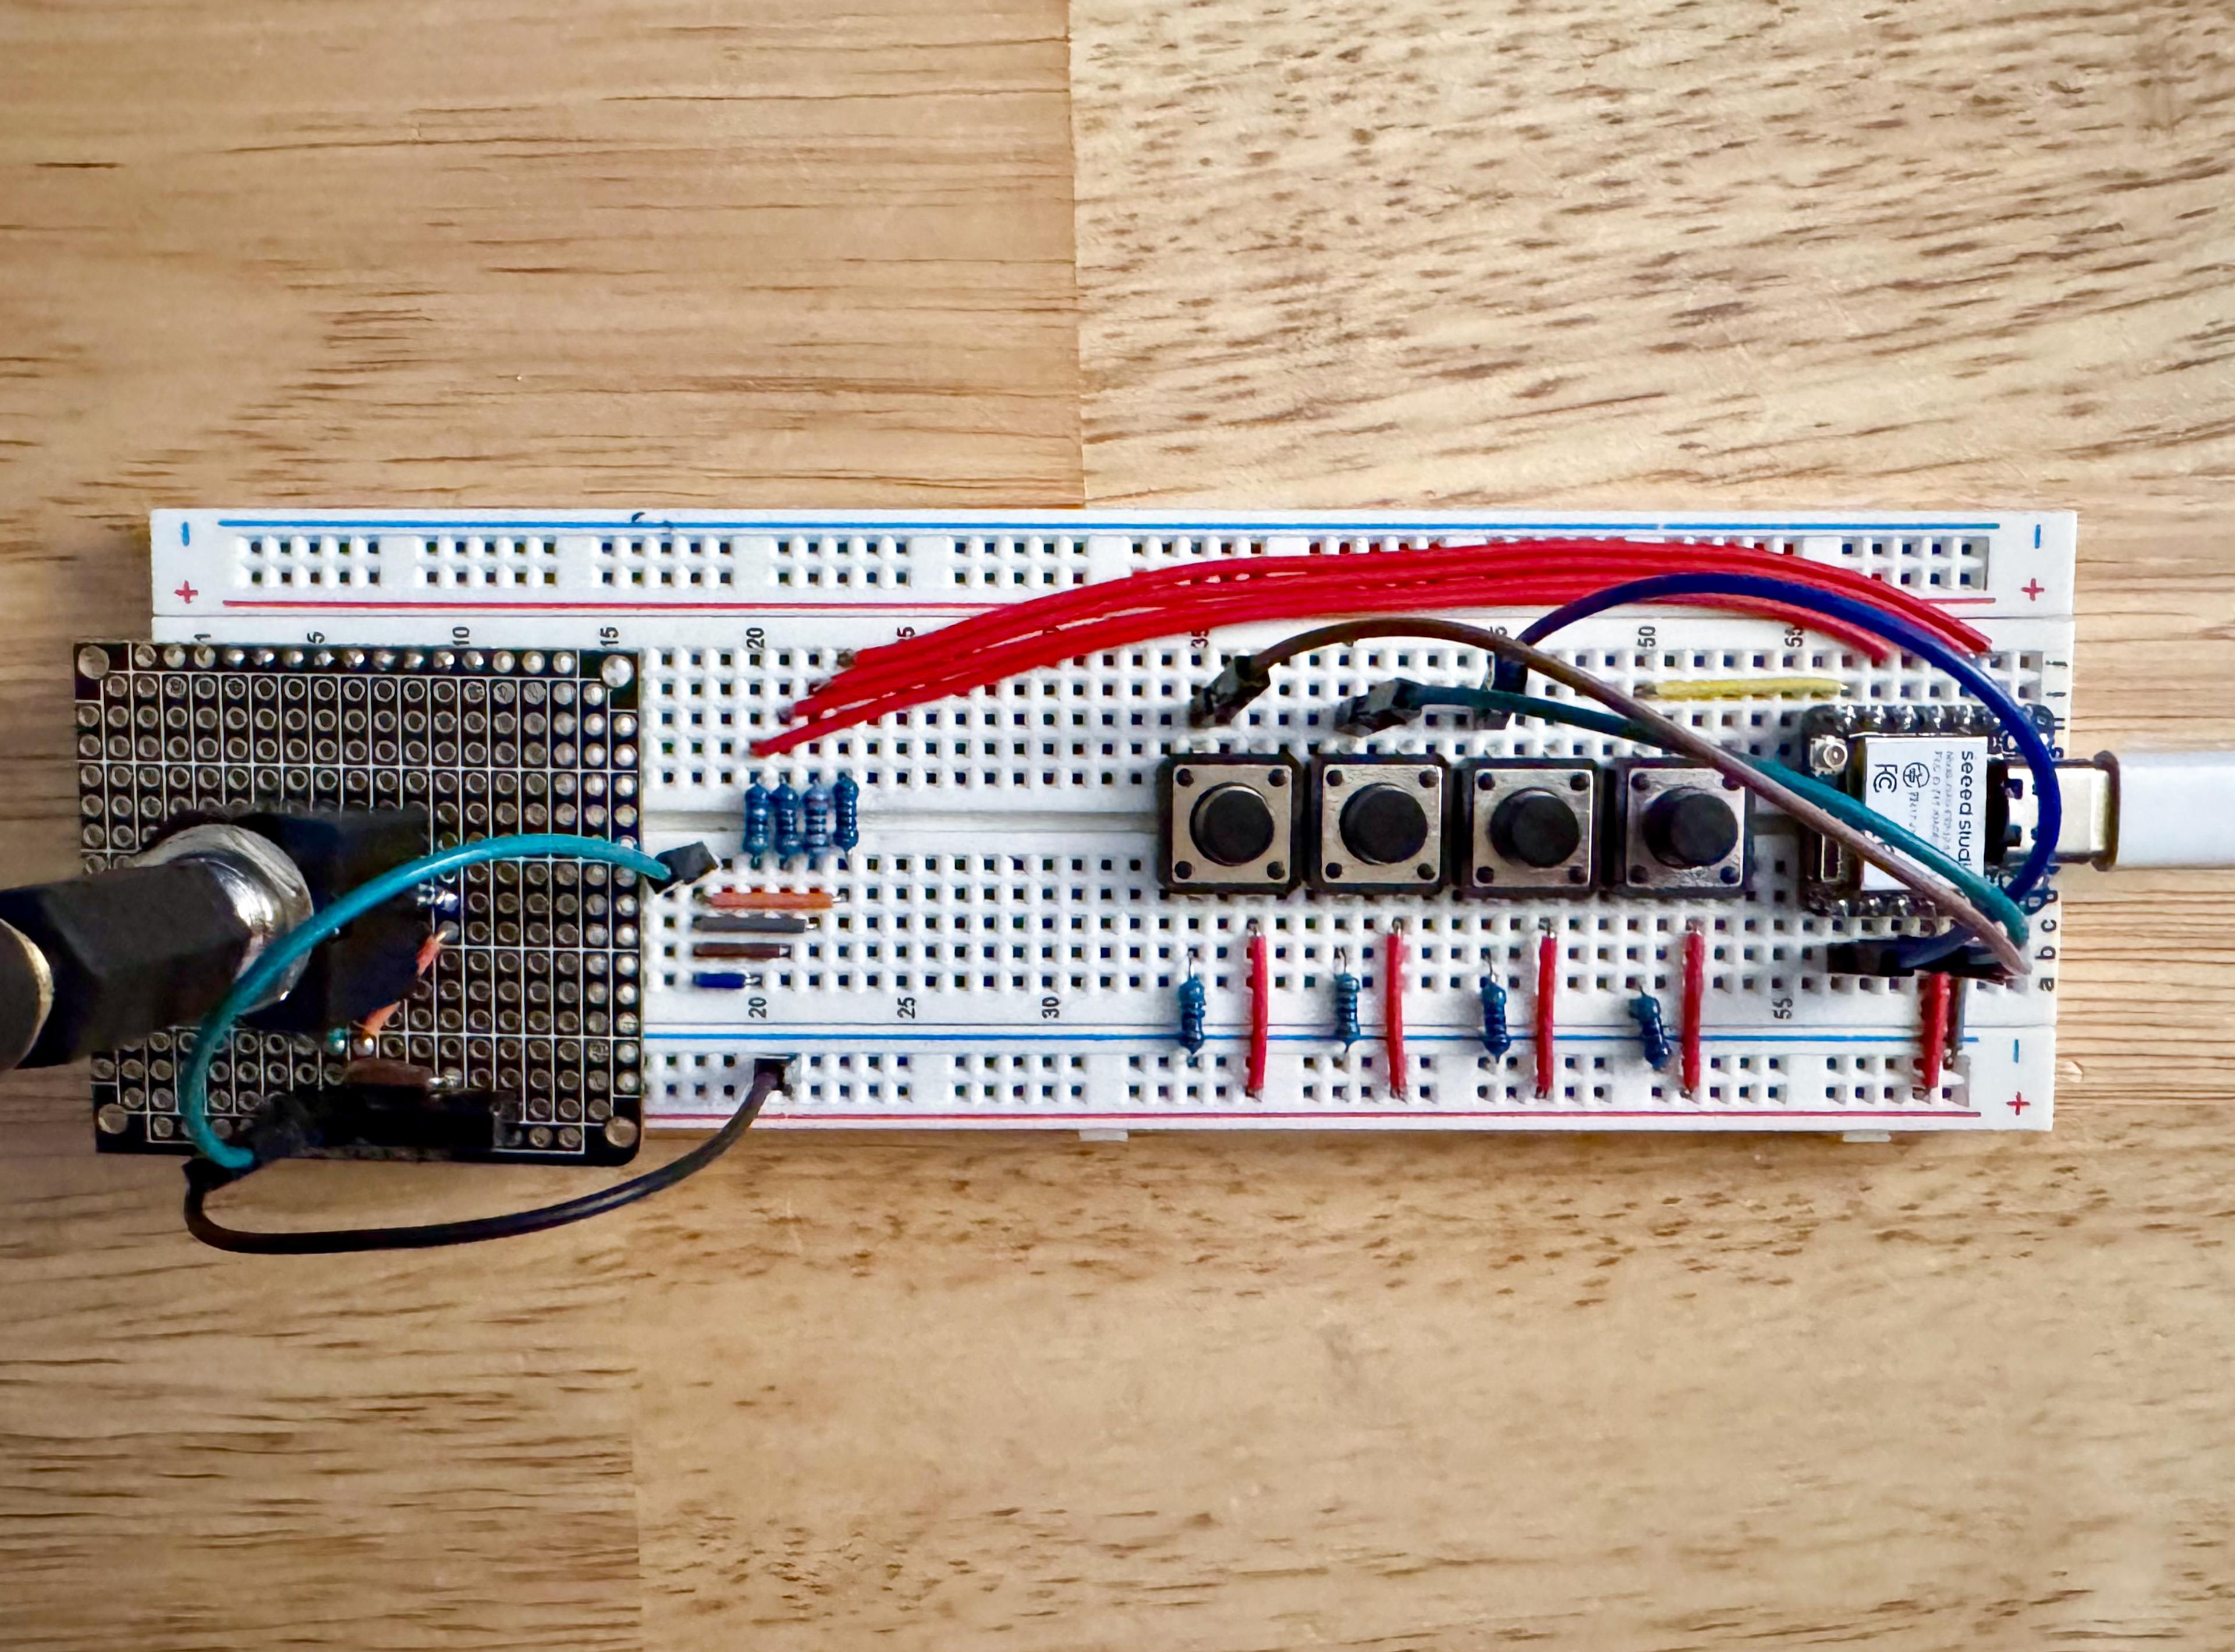
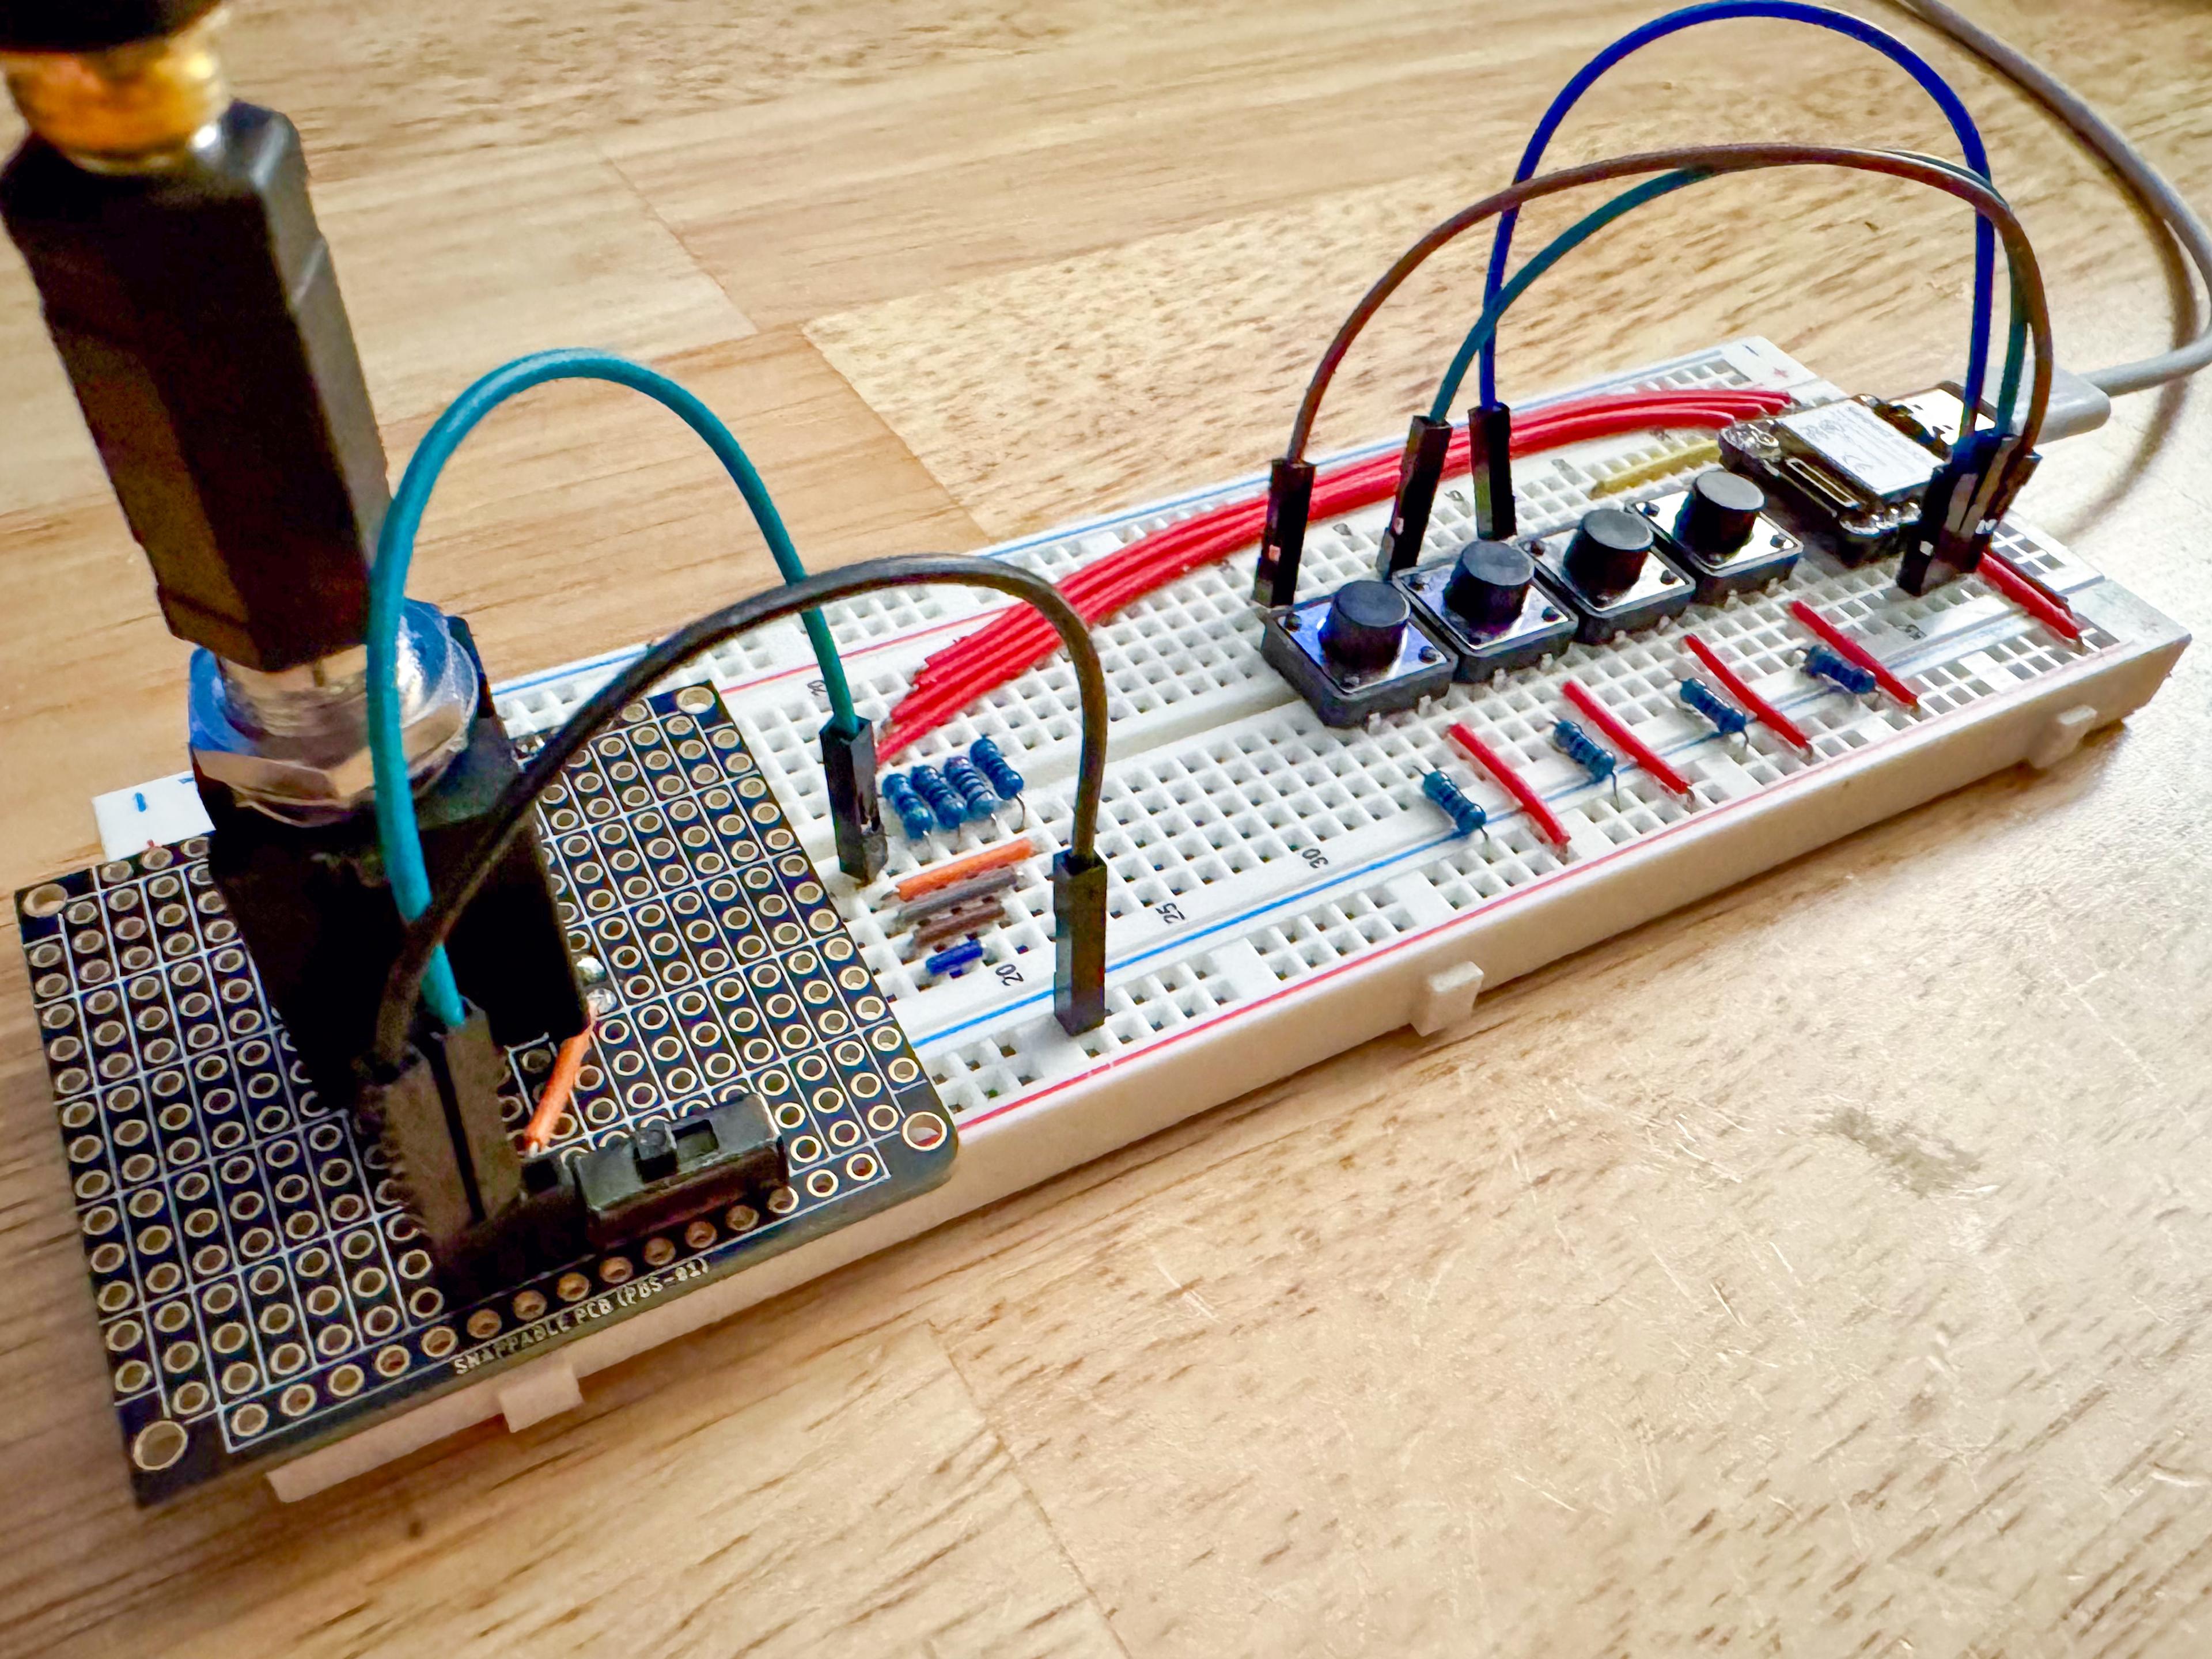
Linto and I each created our own keyboards, although his creates arguably better sounds than mine. I realized after creating the circuit that the resistors in my DAC did not use correct ratios of resistor values for each output, which is probably responsible for some of the dissonant sounds the device generates.
I did not have a breadboard friendly audio output to test the device's sound generation abilities, so created one using a spare 1/4" jack, female DuPont connectors, and a switch. The switch allows me to toggle between mono and stereo by connecting or disconnecting the left and right inputs.
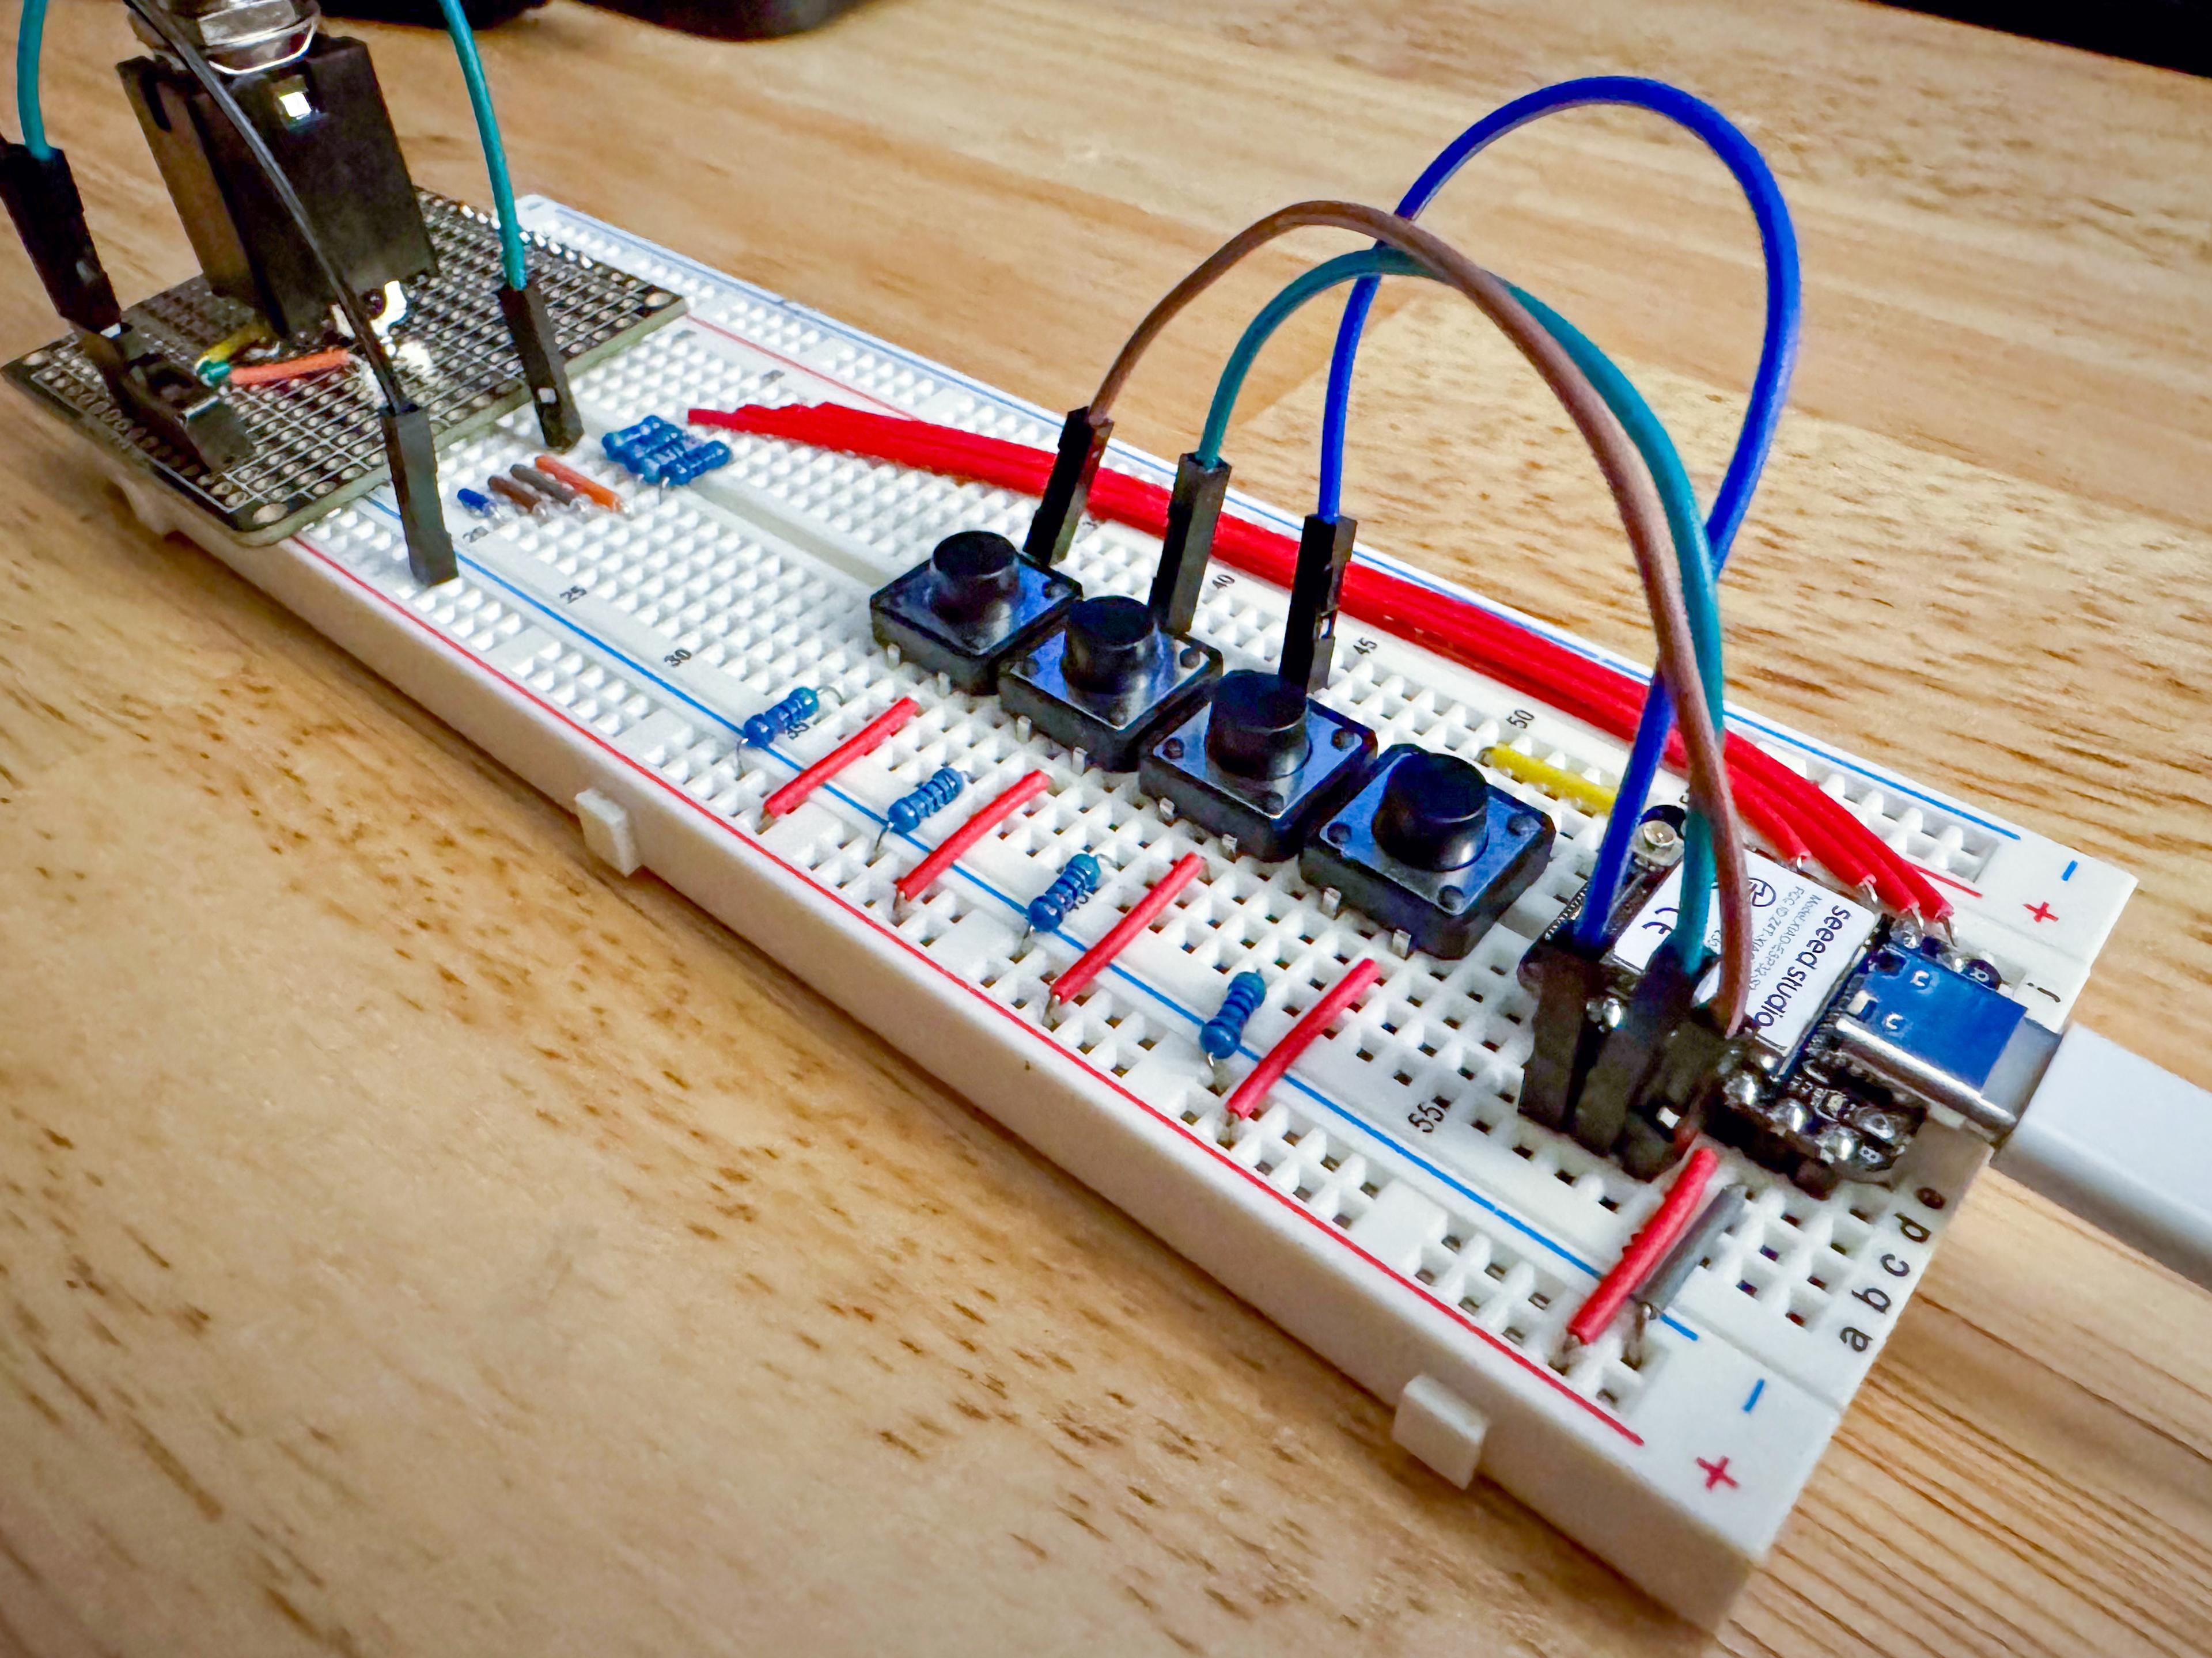
The images below show my circuit design from a few different angles.
Demo
The first video below demonstrates the basic functionality of the synthesizer. In the second video, I connected the synthesizer to my guitar rig and experimented with different effects.
Downloads
Code for this project can be downloaded here.

